So, you’re new to Jaltest diagnostic software but need help figuring out where to start. In this helpful guide, we will cover the basics you need to get started, providing useful first-time advice to help you navigate the software effectively.
What is Jaltest Diagnostic Software?
Jaltest is a multi-brand and multi-system diagnostic tool used by professionals worldwide. It offers advanced diagnostics, repair information, and maintenance management capabilities for various types of vehicles and machinery. Whether you’re a mechanic, a fleet manager, or a technician, Jaltest helps streamline diagnostics and repairs, ensuring efficient and accurate outcomes.
Getting Started with Jaltest
- Setting Up Your Jaltest Software
Installation
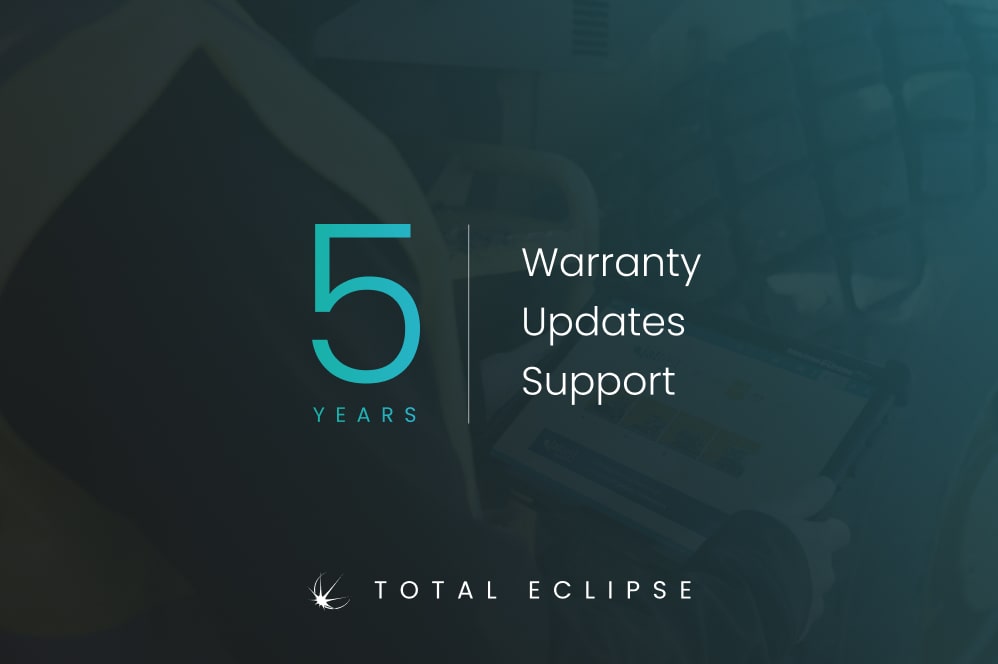
As standard with all of our diagnostic packages, we install and activate all software for you prior to delivery so everything is ready to go. The only thing you need to do when you receive your kit is call our Technical Support team to unlock the software. This means you don’t have to worry about installing and setting up software – we’ll do that for you.
If you’re supplying your own PC, however, you will need to install the Jaltest software, which can be downloaded from the Jaltest website. But again, our technical support team are on hand to assist with this and even remote onto your PC to do it for you.
Hardware Connection
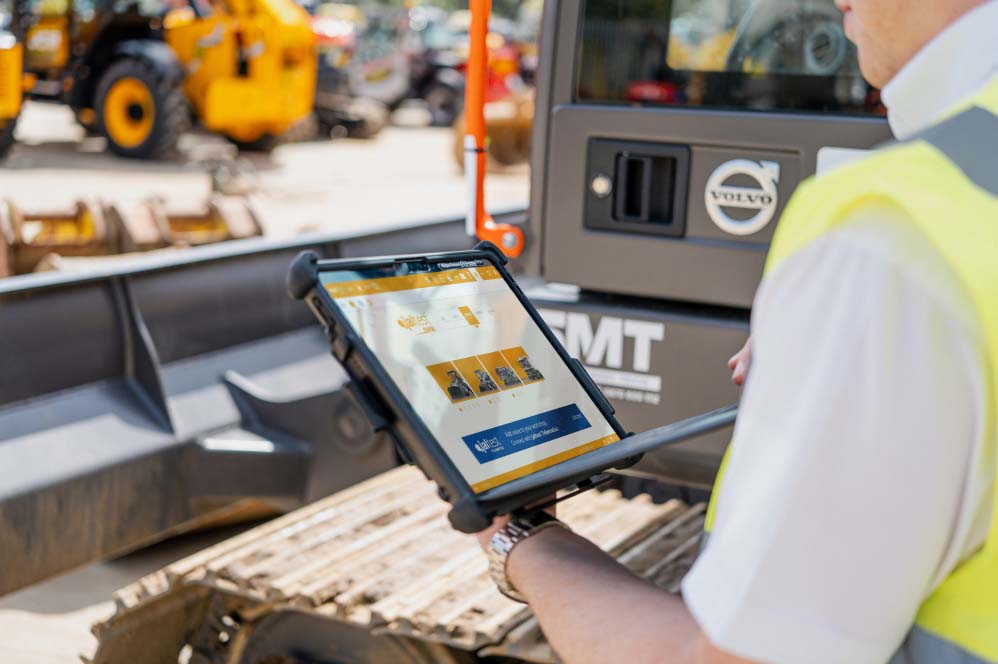
- Interface Device: Connect the Jaltest Link, the diagnostic interface, to your PC via USB or Bluetooth.
- Vehicle Connection: Connect the Jaltest Link to the vehicle’s diagnostic port. This port’s location varies depending on the vehicle type, so refer to the Jaltest software which will tell you the location of the port on the vehicle with an accompanying image/diagram.
- Navigating the Jaltest Software Interface
Once installed, launch the Jaltest software. Here’s a quick overview of the main interface components:
- Home Screen: The starting point where you can access different modules and functions.
- Vehicle Module Selection: Choose the vehicle type you are working with (e.g., trucks, buses, agricultural machinery).
On the sidebar, there will be:
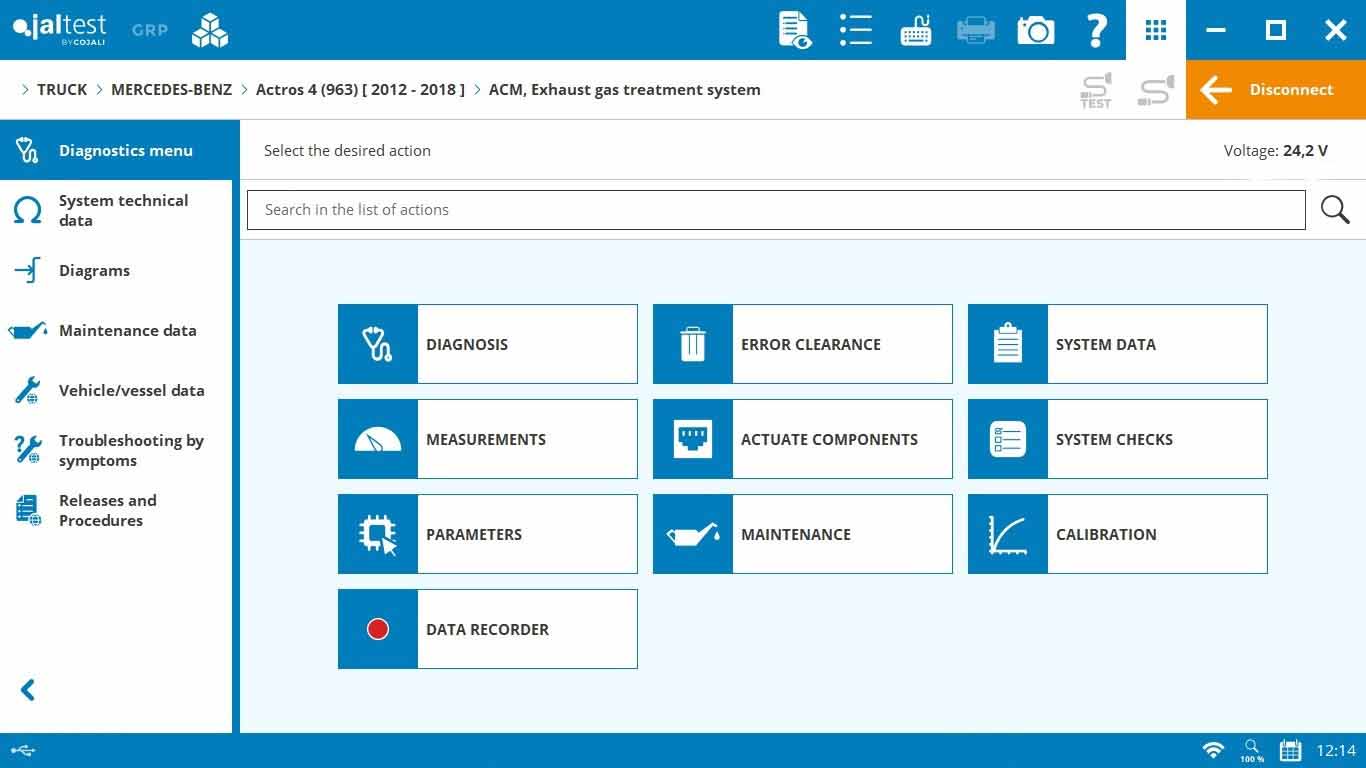
- Diagnostics Menu: Access diagnostic functions, read/clear fault codes, and view system information.
- System technical data: Specific system information such as component locations, test data etc.
- Diagrams: View interactive wiring diagrams across the different components and systems on the vehicle.
- Maintenance Data: Access detailed repair instructions and maintenance schedules.
- Vehicle/vessel data: Access vehicle data such as belt layouts, oils, valve clearances, tightening torques, reference measurements and more.
- Troubleshooting by symptoms: Search from a list of potential issues with troubleshooting instructions to follow.
- Releases and procedures: Step-by-step guides for performing routine maintenance operations.

- Performing a Basic Diagnostic Test
Vehicle Selection
- Select Vehicle Type: From the home screen, select the appropriate vehicle category.
- Enter Vehicle Details: Input the specific make, model, and year of the vehicle. This ensures accurate diagnostics. You can also “search by VIN” (search icon at the top left with the magnifying glass) and it will automatically input the vehicle details for you.
Running Diagnostics
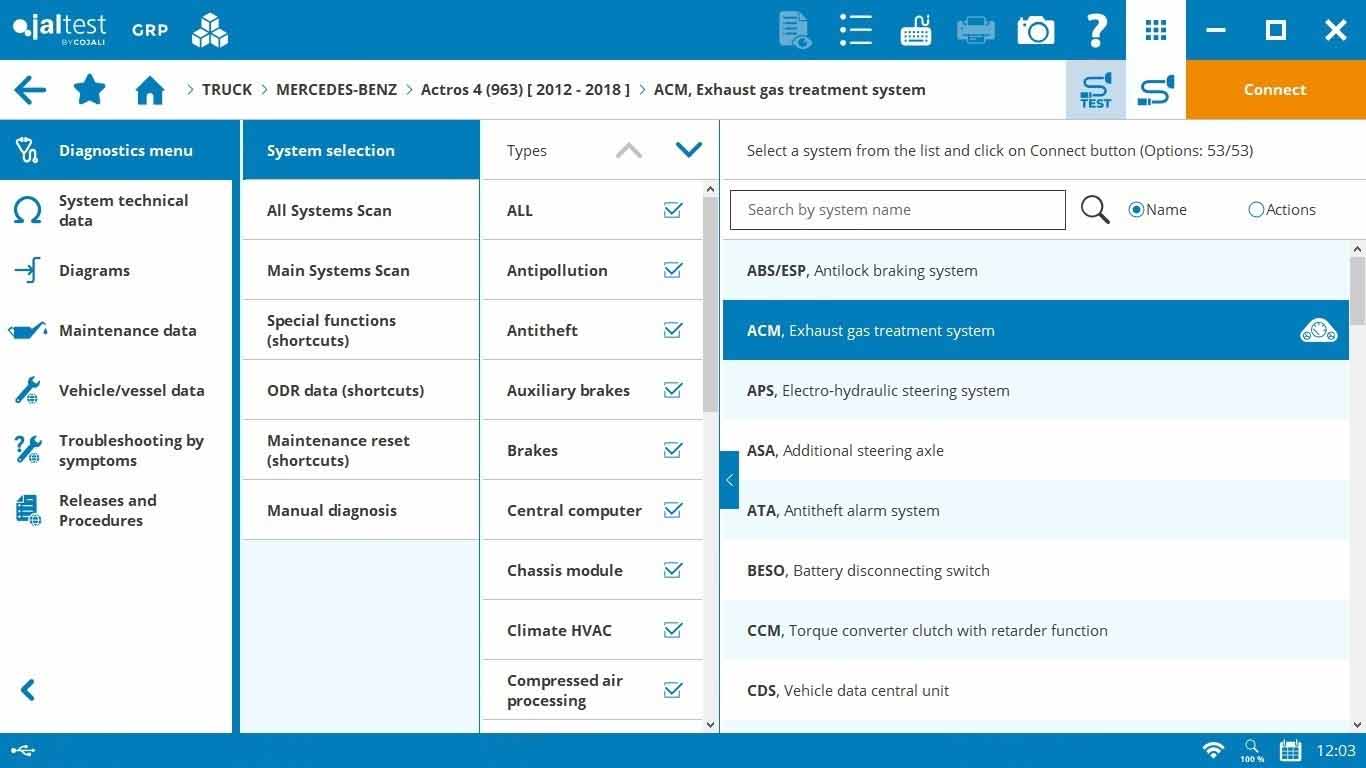
- Connect to Vehicle: Ensure the Jaltest Link is properly connected to both the vehicle and your PC.
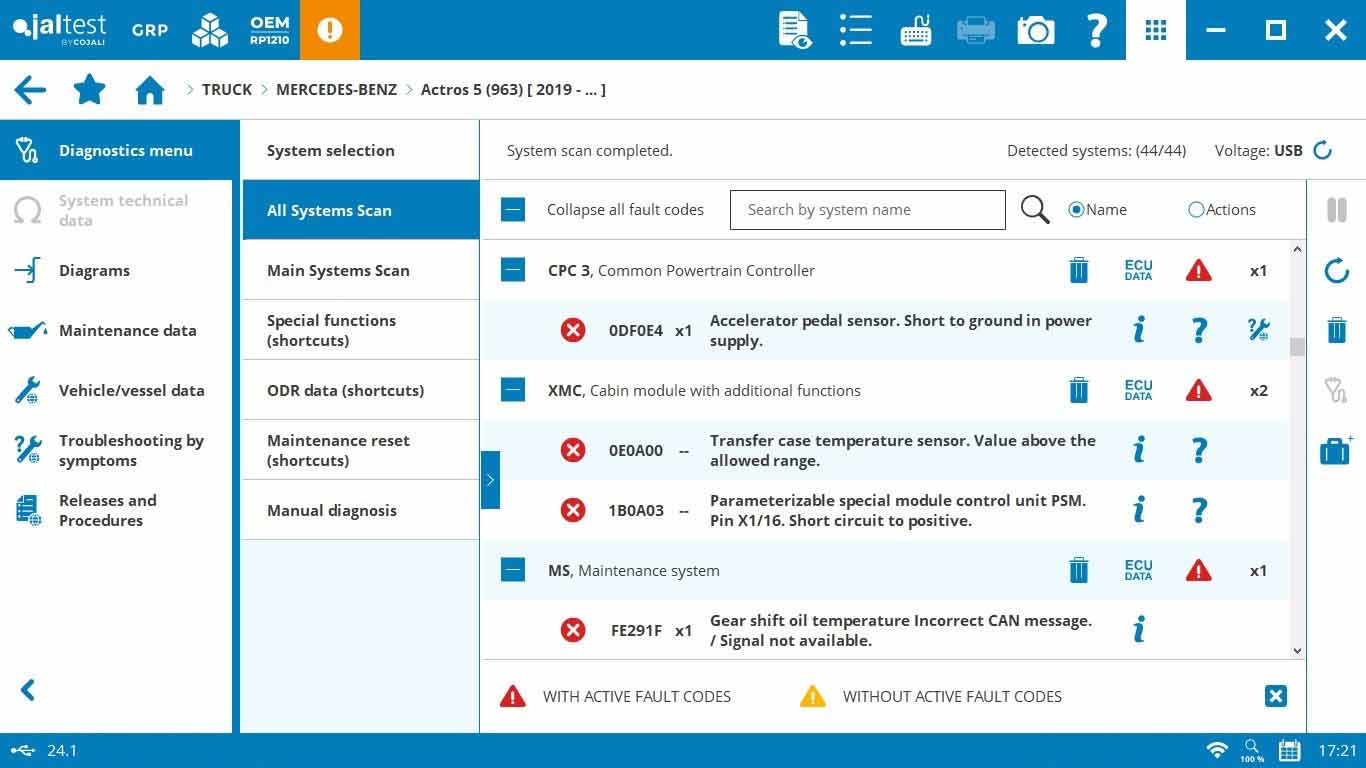
- System Scan: Use the Software to perform a scan of the vehicle’s systems. This will detect any fault codes and provide a general overview of the vehicle’s health. You can choose between “All systems scan”, “Main system scan” or even select only specific systems to scan.
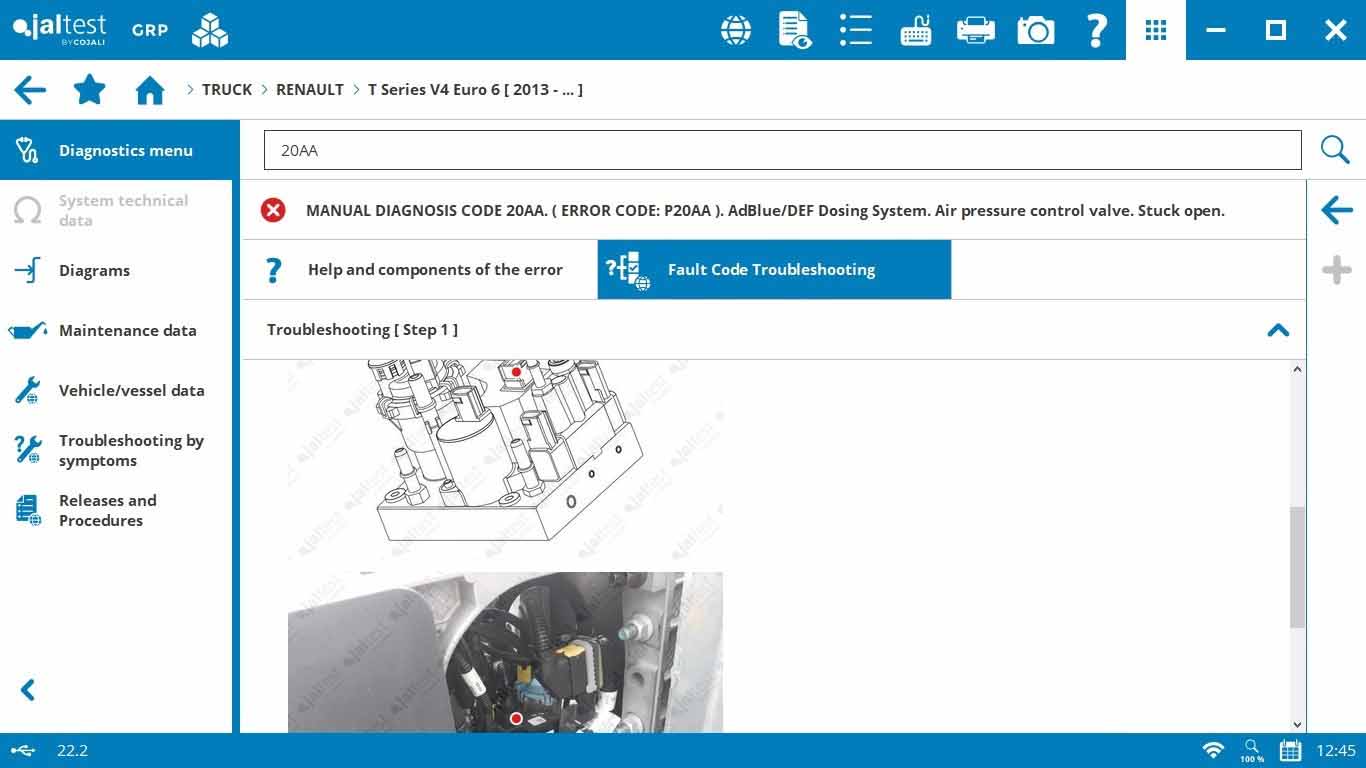
- Reading Fault Codes: Review the fault codes displayed. Each code corresponds to a specific issue within the vehicle’s system. These are OEM fault codes so the same codes that the manufacturers use.
- Interpreting Diagnostic Results
- Fault Code Analysis: Each fault code comes with a description and possible causes. Jaltest provides detailed information to help you understand the problem.
- Live Data: Monitor real-time data from various sensors and components. This is useful for diagnosing issues that are not captured by fault codes alone.
- Actuator Tests: Perform tests on specific components to ensure they function correctly. This can help pinpoint the exact cause of a fault.
- Utilising Repair and Maintenance Information
Jaltest offers comprehensive repair guides and maintenance information:
- Repair Guides: Access step-by-step instructions for fixing the identified faults. These guides include diagrams, component locations, and necessary tools.
- Maintenance Schedules: View and manage maintenance schedules for different vehicles, ensuring timely servicing and upkeep.
First-Time Advice for Jaltest Beginners
- Take Advantage of Technical Support
Eclipse offer dedicated technical support to help you with any issues you might face. Don’t hesitate to reach out for assistance, especially when dealing with complex diagnostic problems.
- Familiarise Yourself with the software
Spend some time exploring the different modules and features of the Jaltest software. Understanding the layout and available functions will make your diagnostic process smoother.
- Use Online Resources
Jaltest provides detailed online resources on their website, including video tutorials and FAQs. These can be invaluable when you encounter unfamiliar features or need troubleshooting assistance. In addition, YouTubers such as ‘TruckTechUK‘ share useful how-to videos on how to use the Jaltest software and solve diagnostic problems which are an excellent resource if you’re starting out.
- Regularly Update the Software
Ensure your Jaltest software is always up to date. Regular updates include new features, improved diagnostics, and expanded vehicle coverage, ensuring your tool remains effective.
- Practice on Different Vehicles
If possible, practice using Jaltest on different types of vehicles. This will help you become comfortable with the various diagnostic procedures and vehicle-specific nuances.
- Join Jaltest User Communities
Engage with other Jaltest users through online forums and user groups. These communities can provide support, share tips, and offer insights based on real-world experiences.
- Attend Training Courses
Along with the handover training that we provide, which goes over the main Jaltest functions, we at Eclipse can also offer more in-depth training that allows you to dig a little deeper into what Jaltest can do.
Conclusion
Getting started with Jaltest diagnostic software might seem daunting at first, but with the right approach, you can quickly become proficient in using this powerful tool. By following this guide, you’ll be well on your way to effectively diagnosing and repairing a wide range of vehicles. Remember to explore all the features, utilise available resources, and seek support when needed. With practice and experience, Jaltest will become an invaluable part of your diagnostic toolkit.